In my previous posts, I’ve talked about unit testing AngularJS controllers. The idea was just to unit test the code we have already written. But that’s not the ideal way we should write new functional code, isn’t it?
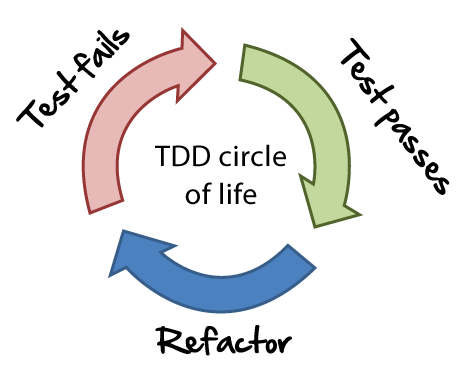
It should be other way round. Ideally, the development of the code/component should be test driven. What does that really mean is, ideally, we should start writing the unit test case first, let the test fail, write the code as per test case’s expectations and then let the test pass.
There is much content available online for the people who know AngularJS and want to learn Angular 2+. However, not quite good posts are available to learn TDD approach for this technology. This post talk about how to do so. Keep in mind that there is a slight paradigm shift needed for TDD so its okay if you think you are not able to digest the steps at the very first attempt, after 2 – 3 try, I’m sure you are going to start liking this. So let’s jump in! 🙂
Below are the steps to follow while doing TDD (reference: wikipedia)
- Add a test
- Run all tests and see if the new test fails
- Write the code
- Run tests
- Refactor code
We are going to follow the same for Angular using amazing command line utilities provided by @angular/cli.
We are going to develop an angular 5 component which does addition/subtraction/multiplication. We will be having two properties for two operands and three methods to perform the operations respectively. For each operation, we will go through three basic different scenarios which fits most of the day to day code we write.
Prerequisites: You must be having below tools installed on your machine.
- NodeJS
- npm
- @angular/cli: version 1.7
- VSCode (not mandatory, but the best if you use this)
- Basic understanding of Unit Testing in Angular with Jasmine would help.
So what are we waiting for? Let’s start!!!
Create new Angular application to begin. From your command prompt, type below command for that.
ng new ng5-tdd
This command will take awhile and create the basic application structure for you. Once this is done, open it using VSCode and start VSCode command prompt with Ctrl+`.
Create a new component as per below code snippet.
D:\ng5-tdd>ng g c calculator
                           //g - generate, c - component
 create src/app/calculator/calculator.component.html (29 bytes)
 create src/app/calculator/calculator.component.spec.ts (656 bytes)
 create src/app/calculator/calculator.component.ts (285 bytes)
 create src/app/calculator/calculator.component.css (0 bytes)
 update src/app/app.module.ts (414 bytes)
Many files has got created. Now open calculator.component.spec.ts. Keep in mind that we are doing TDD here! 🙂
Now, let’s add below test case in this file.
This file contains bidirectional Unicode text that may be interpreted or compiled differently than what appears below. To review, open the file in an editor that reveals hidden Unicode characters.
Learn more about bidirectional Unicode characters
| it('should do addition', () => { | |
| component.param1 = 5; | |
| component.param2 = 7; | |
| component.add(); | |
| expect(component.result).toBe(12); | |
| }); |
After pasting the code your editor should have started screaming by now. 🙂 Yeah. It must. As we haven’t added the code yet. So go ahead and copy-paste-save below code in your calculator.component.ts.
This file contains bidirectional Unicode text that may be interpreted or compiled differently than what appears below. To review, open the file in an editor that reveals hidden Unicode characters.
Learn more about bidirectional Unicode characters
| export class CalculatorComponent implements OnInit { | |
| param1: number; | |
| param2: number; | |
| result: number; | |
| constructor() { } | |
| add() { | |
| this.result = this.param1 + this.param2; | |
| } | |
| ngOnInit() { | |
| } | |
| } |
Here, as you see, we have added the necessary properties and method for the addition operation. This was just a simple scenario – straight forward. In real life, the story is not that simple, isn’t it?
Usually, such functionalities (in our case, business logic) is either stays in Services, or it stays at sever.
So let’s go ahead and create a service to do some action.
D:\ng5-tdd>ng g service calculator/math
 create src/app/calculator/math.service.spec.ts (362 bytes)
 create src/app/calculator/math.service.ts (110 bytes)
This file contains bidirectional Unicode text that may be interpreted or compiled differently than what appears below. To review, open the file in an editor that reveals hidden Unicode characters.
Learn more about bidirectional Unicode characters
| // update TestBed configuration to use MathService as one of the providers | |
| // in the DESCRIBE section | |
| beforeEach(async(() => { | |
| TestBed.configureTestingModule({ | |
| declarations: [ CalculatorComponent ], | |
| providers: [MathService] // <=== add this line | |
| }) | |
| .compileComponents(); | |
| })); | |
| // adding another test besides IT code block | |
| it('should call mathService to do subtraction', () => { | |
| const mathSvcInstance = TestBed.get(MathService); | |
| // Remember – what MathService SHOULD return, that's none of you business right now. | |
| // you are testing calculator component – Separation of Concerns | |
| spyOn(mathSvcInstance, 'subtract').and.returnValue(500); | |
| component.param1 = 5; | |
| component.param2 = 7; | |
| component.subtract(); | |
| expect(mathSvcInstance.subtract).toHaveBeenCalledWith(component.param1, component.param2); | |
| expect(component.result).toBe(500); | |
| }); |
Again, you must be getting errors, so go ahead and update the component code to make this test pass.
This file contains bidirectional Unicode text that may be interpreted or compiled differently than what appears below. To review, open the file in an editor that reveals hidden Unicode characters.
Learn more about bidirectional Unicode characters
| constructor(private mathSvc: MathService) { } | |
| subtract() { | |
| this.result = this.mathSvc.subtract(this.param1, this.param2); | |
| } | |
Here we have injected MathService as a dependency. You should have noticed that in the test case, 5 * 7 doesn’t equal to 500. But still we made the test pass. Why? The reason is, the component is simply assigning the return value to the result property. So in the test, we just need to make sure that the value returned by the service is getting assigned at the appropriate place. That’s it!
Now many times service gives asynchronous result. We are going to test that scenario next. Make changes as per below files suggest.
This file contains bidirectional Unicode text that may be interpreted or compiled differently than what appears below. To review, open the file in an editor that reveals hidden Unicode characters.
Learn more about bidirectional Unicode characters
| import { Injectable } from '@angular/core'; | |
| import { HttpClient } from '@angular/common/http'; | |
| import { Observable } from 'rxjs'; | |
| @Injectable() | |
| export class MathService { | |
| constructor() { } | |
| subtract(a: number, b: number): number { | |
| return a + b; | |
| } | |
| multiply(a: number, b: number): Observable<any> { | |
| // you'll do this while doing TDD got this service | |
| // return this.http.post('you-multiplication-api-url', {a: a, b: b}); | |
| // as of now, be happy with TDD for component, and return below 🙂 | |
| return Observable.of(50); | |
| } | |
| } |
This file contains bidirectional Unicode text that may be interpreted or compiled differently than what appears below. To review, open the file in an editor that reveals hidden Unicode characters.
Learn more about bidirectional Unicode characters
| import { async, ComponentFixture, TestBed } from '@angular/core/testing'; | |
| import { CalculatorComponent } from './calculator.component'; | |
| import { MathService } from './math.service'; | |
| import { Observable } from 'rxjs/Rx'; | |
| class mockMathService{ | |
| subtract(a: number, b: number) { return 0; } | |
| multiply(a: number, b: number) { return Observable.of(0); } | |
| } | |
| describe('CalculatorComponent', () => { | |
| let component: CalculatorComponent; | |
| let fixture: ComponentFixture<CalculatorComponent>; | |
| beforeEach(async(() => { | |
| TestBed.configureTestingModule({ | |
| declarations: [ CalculatorComponent ], | |
| providers: [ | |
| { provide: MathService, useClass: mockMathService } | |
| ] | |
| }) | |
| .compileComponents(); | |
| })); | |
| beforeEach(() => { | |
| fixture = TestBed.createComponent(CalculatorComponent); | |
| component = fixture.componentInstance; | |
| fixture.detectChanges(); | |
| }); | |
| it('should create', () => { | |
| expect(component).toBeTruthy(); | |
| }); | |
| it('should do addition', () => { | |
| component.param1 = 5; | |
| component.param2 = 7; | |
| component.add(); | |
| expect(component.result).toBe(12); | |
| }); | |
| it('should call mathService to do subtraction', () => { | |
| const mathSvcInstance = TestBed.get(MathService); | |
| spyOn(mathSvcInstance, 'subtract').and.returnValue(500); | |
| component.param1 = 5; | |
| component.param2 = 7; | |
| component.subtract(); | |
| expect(mathSvcInstance.subtract).toHaveBeenCalledWith(component.param1, component.param2); | |
| expect(component.result).toBe(500); | |
| }); | |
| it('should call mathService to do multiplication', () => { | |
| const mathSvcInstance = TestBed.get(MathService); | |
| spyOn(mathSvcInstance, 'multiply').and.returnValue(Observable.of(35)); | |
| component.param1 = 5; | |
| component.param2 = 7; | |
| component.multiply(); | |
| fixture.detectChanges(); | |
| expect(mathSvcInstance.multiply).toHaveBeenCalledWith(component.param1, component.param2); | |
| expect(component.result).toBe(35); | |
| }); | |
| }); |
This file contains bidirectional Unicode text that may be interpreted or compiled differently than what appears below. To review, open the file in an editor that reveals hidden Unicode characters.
Learn more about bidirectional Unicode characters
| import { Component, OnInit } from '@angular/core'; | |
| import { MathService } from './math.service'; | |
| @Component({ | |
| selector: 'app-calculator', | |
| templateUrl: './calculator.component.html', | |
| styleUrls: ['./calculator.component.css'] | |
| }) | |
| export class CalculatorComponent implements OnInit { | |
| param1: number; | |
| param2: number; | |
| result: number; | |
| constructor(private mathSvc: MathService) { } | |
| add() { | |
| this.result = this.param1 + this.param2; | |
| } | |
| subtract() { | |
| this.result = this.mathSvc.subtract(this.param1, this.param2); | |
| } | |
| multiply() { | |
| this.mathSvc.multiply(this.param1, this.param2) | |
| .subscribe(data => this.result = data); | |
| } | |
| ngOnInit() { | |
| } | |
| } |
So after updating the files, you’ll see that all of your tests pass and you have done async programming with TDD.
Conclusion
TDD is a slight paradigm shift to start with. However, you’ll be used to it once you start doing it. And in the agile software development, it is the ideal way a developer should do the implementation.

How do you like this post? Any thoughts, something you liked the most or anything you want to see improved? Feel free to share your thoughts in the comments below! I’ll be glad to know! See ya next time. Till then, happy TDDing 🙂